
Looking down at my handlebars around mile 50, I felt a pang of alarm at the sight of unfamiliar decals. Then I remembered: I wasn't riding my own bike. I had gotten so comfortable, I'd forgotten. A stern voice in my head began to chastise me. "Come on, you are doing a test ride. You're supposed to be paying attention to the ride characterisics - not enjoying the scenery." Easier said than done!
To explain how I came to test ride the Parlee Z5, it may help to give a bit of a backstory. For some time, I've been interested in getting a feel for carbon fiber roadbikes. However, my attempts at this have been less than successful. I've ridden a handful of carbon bikes briefly, but either they were not set up for me to do a proper test ride, or I found the ride quality too harsh to actually want to ride them for any length of time. Of course not all carbon bikes feel the same, just like not all steel bikes feel the same. With this in mind, I finally approached the matter more strategically and talked to some industry insiders familiar with my riding style and preferences. A few suggestions kept coming up. Among them was the Parlee Z5.
Parlee Cycles are a small and local-to-me company, based in Beverly, Massachusetts. So the idea of trying one of their bikes was appealing. Later this summer I plan to visit the factory and write about them in more detail. Parlee offers both custom frames, built on the premises, and production models designed inhouse and built in Taiwan. The Z5 is the latter.
The demo bike was lent to me by Cycle Loft, a Boston Parlee dealer. After undergoing a fitting session, my position on the Z5 ended up near-identical to that on my own roadbike, making for a seamless transition. I kept the bike for a week and rode it for about 135 miles.

Even before I rode the Z5, I could see why this bike was suggested to me. To call its appearance "classic" might be pushing it. But the aesthetic is clean, subtle, neutral. I did not find myself biased against it, in a "Meh, this is ugly" kind of way. In fact, I find it rather pretty.
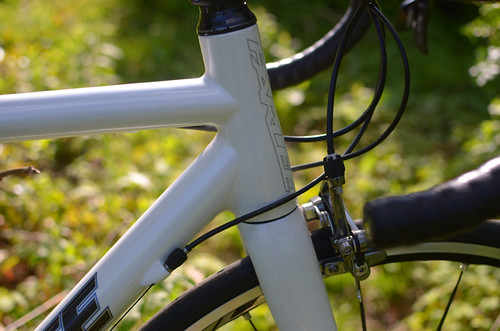
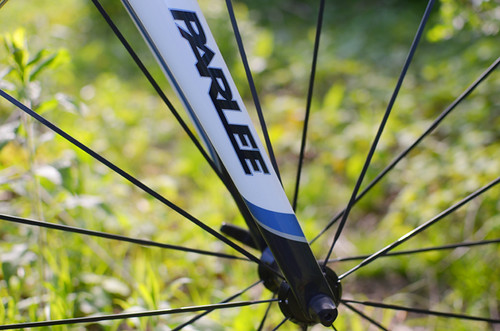
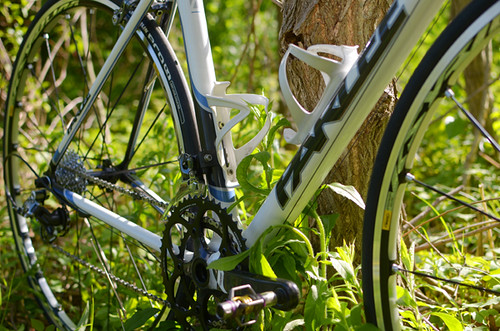
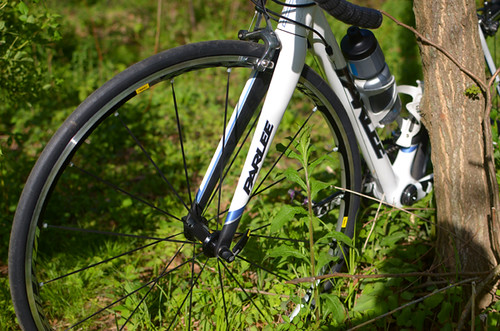
Made from a single carbon piece (what is known as "monocoque construction"), the Z5 frame has a seamless, sculpted look to it. At the same time, the round tubes and the smooth, but crisply delineated joints, bear a resemblance to those of metal bikes. There are no MC Escher-esque bulges or round-to-square taperings here; the frame looks simple and familiar. For those who are curious to try carbon fiber but wince at the look they associate itwith, I do think Parlee eases the transition.
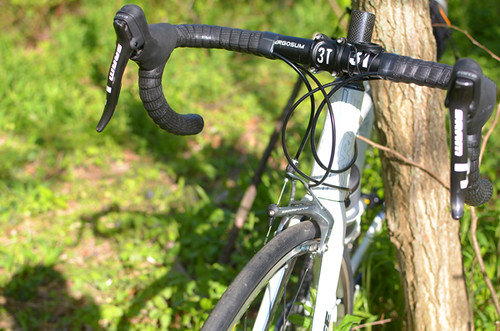
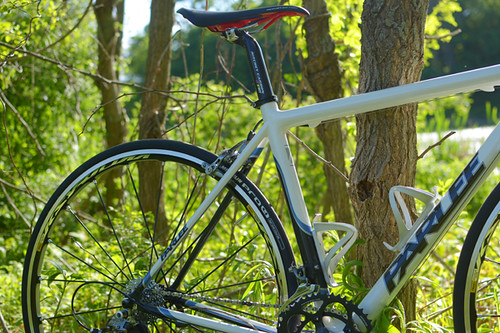
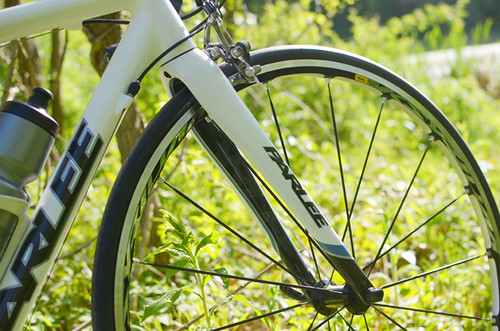
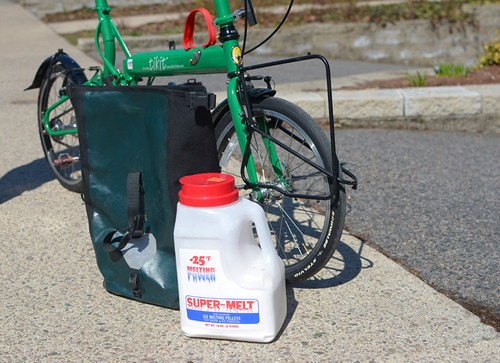
I rode the Parlee Z5 in size Small (Tall), which translates to a 52.5cm top tube and a slightly extended headtube compared to their standard Small. The complete geometry specs are here. The bike was fitted with a SRAM Force group andMavic Ksyrium Elite wheels with 23mm Michelin Pro 4 tires (complete build specs here). Though I have Campagnolo on my own bike, I feel very comfortable with SRAM and have no trouble switching back and forth. The handlebars included in the standard build were 2mm narrower than the (42mm) bars on my own bike, but otherwise the fit was almost identical.

The one disappointment was that the front-center was a bit tighter than I like. With 23mm tires, I had a tiny bit of toe overlap. The amount was minimal, and I still felt comfortable test riding the bike. But with 25mm tires I would not be.
 Riding the Parlee home, my first impressions were dominated by how comfortable it felt - namely, the ride quality over harsh roads, bumps and potholes. To provide some background, I am pretty sensitive to ride quality and cannot stand a bike that feels harsh. It does not matter how fast it is, how nimble, or how good at climbing: If I feel vibrations from the road or pain from going over bumps, I just can't take it for more than a few miles. This sensitivity was a big factor in my own roadbike purchasing decision a couple of years ago, and a major reason I went with a titanium Seven. So with that as my personal bike, granted I am now a bit spoiled in the ride quality department. Lots of bikes feel at least a little harsh compared to my Seven.
Lots of bikes, but not the Parlee Z5. Nope. The Z5 was flawlessly smooth. As in zero road buzz sensation, zero pain over bumps and potholes. At some point I started intentionally riding it over every stretch of broken pavement I could find, but I couldn't feel a thing.Of course, whether it feels painful or not, a roadbike with skinny tires will still toss you around on bad roads. And it is here that I could feel a difference in the Z5 compared to my own bike. Until now, I had considered my Seven to be quite stiff. But after some time on the Parlee, I could feel a "give" in my own bike that I had not detected before. In comparison, there is no give to the Parlee at all; on bumpy roads it sort of bounces as one unit rather than exhibit even a slight amount of yield.
But despite being stiffer, the Parlee did not feel harsher than my own bike, even as I rode it longer. To my surprise, neither did it feel faster. I rode alone and I rode with some fast friends. Each time, speed and effort-wise, it felt just like being on my own roadbike.
I decided to ride the Parlee on a 100K New England Randonneurs "Permanent" course I had done alone a few weeks earlier (67 miles, with 3,800 feet of climbing). Just as I'd done previously, I timed myself and genuinely tried to do my best. My average rolling speed on the Parlee was 13.3mph, whereas on my own bike it had been 13.1mph - a difference too small to be significant, considering that my fitness had also increased a bit since the earlier ride. Of course this bit of anecdotal evidence may not mean much. But it reflects my subjective experience of the bike.
One reason I picked this particular 100K route for the test ride, was for its brief unpaved stretches. The bike rode on broken pavement so nicely, I was curious how it would do on dirt and gravel. Just as nicely, it turns out. While I prefer to do unpaved rides on wide tires at low pressure, if I must ride skinny tires the Z5 is as good as it gets.
Aside from all this, I did feel something distinct to this bike in the course of my test rides. It was a sensation in the rear triangle - possibly the chainstays, and it was specific to cornering. It was as if the rear responded to cornering differently from what I am used to. The chainstay area felt lighter somehow, almost as if it wanted to skip or lift off on corners. Well, maybe describing it that way makes it sound too negative. Unfortunately, I don't know how to explain it any better, but I actually liked this sensation. I found the bike to be maneuverable on corners in a way I had not previously experienced.
Normally, I am pretty sensitive to a bike's front-end handling, and less so to other aspects. The Parlee was the first time I was struck by characteristics specific to the rear of the bike.
While technically not the first carbon fiber roadbike I've ridden, the Parlee Z5 is the first one I've put a sufficient number of miles on to warrant a report. In part this is thanks to Cycle Loft, for lending it out and setting it up to fit me perfectly. And in part it's thanks to the bike's comfortable feel, which made me want to keep riding for miles and miles. Much like on my own bike, I did not experience fatigue on the Z5 after strenuous rides. And much like on my own bike, the handling, for the most part, felt "unnoticeable" - encouraging me to focus on the scenery and the ride itself, rather than on the bike.
Going into this test ride, I had several expectations about the feel and performance of carbon fiber: Namely, that it would feel harsher, stiffer and faster than my own bike. The Parlee Z5 felt only stiffer, and even that was only noticeable to me under certain conditions. Granted, I don't race, I don't ride aggressively, I spin rather than mash, and I don't climb out of the saddle. My impressions are limited to the kind of riding I do. And that riding involves 50-100 mile jaunts, sometimes more, usually with lots of climbing and usually on bad roads.I like a fast bike that makes me feel weightless. And I also like to be comfortable. As far as that kind of riding goes, I felt right at home on the Parlee Z5.


 (Photo by Steve Machuga)
 Looking down from two pitches up. (Photo by Steve Machuga)
 Starting the third pitch (Photo by Steve Machuga)
 Steve leading the second 5.10 pitch
 Surmounting the overlap (Photo by Steve Machuga)
 The final .10b "headwall"
 (Photos by Steve Machuga)
 (Photo by Steve Machuga)
 August 1998. Digitized ...Copyright © 1998/.. by Rebeckah R. Wiseman


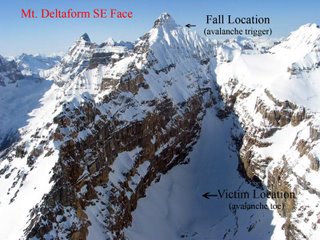 The information about Gabe was positive considering the fact that he was carried over 3,000 feet in an avalanche down the side of a major Canadian mountain! After the slide, Gabe fortuitously was not buried, but did end up spending three days and nights alone (at times in sub-freezing weather) on top of the debris.
.JPG)