Tuesday, May 29, 2012

Ice, Snice and a good Screw...

Here is another recycled bit from 2/1/10 early last winter.


I wrote the following on 2/28/08


"Ice screws? If you are not currently climbing with the newest generation of Grivel screws you are wasting energy. I’ve tried EVERY new screw design currently on the market, in almost every snow and ice condition you can think of. With all due respect to Black Diamond, and with no hype, no bs, there is no other manufacture even close to Grivel's current production. The Grivel screws are as revolutionary to ice climbing as Jardine's Friends were 30 years ago. Big statement I know. But placing good gear, easily, where you want it instead of were you could makes climbing much, much easier and a lot safer."


"To support my comments I have the newest Grivels (360s and Helix) and both models of the newest BD screws on my rack now. I'll stand by my original comments as the Helix being the best of the bunch the majority of time. Although the 360 is good may be even a toss up with the BDs..although the BDs rack/stack and deploy much easier. The BDs just don't start or cut ice as easily. I am not a big fan of the 360, wacky hanger design, although the 360 does have an advantage over all of them in tight placements."


"Sitting here at the key board I see that the BD screw has longer initial teeth and a thinner tube profile. Both of which should be an advantage over the Grivel chewing into ice. Grivel threads start a bit shallower at the teeth (by 1/10s of an inch). Which technically means it will start a bit quicker but it isn't much. The thread designs are totally different from Grivel to BD. Grivel's finish is obviously smoother. All issues which will make a difference +/- in performance.


I'll easily admit both Companies offer good products and everyone develops there own preferences."


In the past two years, I have learned a lot about ice screw manufacture. The level of nickel plating, the weight of ice screws, the differences in thread, tooth and tube profiles and the inside diameter of the tubes. I've looked at the hanger designs and how that effects racking and initial placement.


In design and manufacture I would have thought that the newest BD screws would have been the best available. I've seen a multitude of in house tests that show all sorts of info why the BD or the Grivel tubes are the "best".


I am a big believer in numbers so the other day I pulled out a few more brand new BD Express screws to make up for the other half of my Helix rack I would leave at home. Off I went, fat, dumb and happy to the local ice crag.


Mind you the climbing wasn't hard...WI4 and good feet but really bad ice. Ice was covered with snow in many places, terribly chandelier and thin. Scary enough for me that many times I was placing two screws at a time hoping to get at least one solid screw if I wasn't hitting rock. Not a technique I would normally use or recommend so you can get an idea on my mind set. In 130 feet I placed 9 screws as pro. 6 of them were placed as 3 pairs.


Once again I got a clear picture of the actual physical differences between BD and Grivel screw placement. I then spent part of the afternoon today, resharpening the same batch of screws, both BD and Grivel.


Some of my observations I found interesting while doing the sharpening. The BD screws remind me of a fine honed razor knife. Really sharp but something that won't hold an edge for long or be very durable. Cuts well till it gets dull. But the thinner side walls and razor edge dulls quickly in my experience. The Grivel on the other hand have more of what I would call a "combat edge", that stays sharp even with some abuse. Both take some effort to resharpen to factory spec.


I don't particularly like the 360. I find the crank and hanger too cumbersome in use. So I generally don't use it. The Helix marginally better. But enough better that I prefer its down sides over the additional effort to place a BD Express. I have no loyalty to any gear manufacture be it BD or Grivel. My loyalty is guaranteed by what works.


So I used the Helix on water ice almost exclusively. But because of the huge weight savings over any other steel screw I take the BD Turbos into the alpine...for water ice or snice. There is so little "real" difference in use between the two brands. But the weight difference is a "big" thing. 20g or close to 1 oz in a 6 oz screw.


Last winter a BD Express literally saved my live while being lowered off a thin lead and one of my two screws popped out of marginal snice. Another place where I had set a pair of screws hoping for the best. A pair of BD Express this time and the only gear 60 feet out, set in a tiny patch of "hope and a prayer" snice, 10" apart. The first screw popped within milliseconds after taking full body weight! The second took the dynamic load and then held, thankfully. My guardian angel had to work over time for a few months last year :)


Screws are really expensive these days. BD Express or the Grivel Helix can be had for $55/60.

I pay retail for mine and it is painful. I'd suggest you "try before you buy" if it is possible.


A comment from a buddy I trust, Doug Shepard, doing a BD Turbo Express review in Dec of '07.


"How is real world performance? These things rock!


They start easier than my old BD screws. At least as fast to start and place as the Grivel 360 screws in my opinion, which I thought was the fastest screw on the market to place. Combined with the multiple clip-in points, this screw takes what is great about the Petzl Laser (ease of use), the Grivel 360 (extremely easy to start), and the old Turbo Express (durability and ease of racking) and duplicates or improves on each idea.


Multiple partners have all commented on how much easier the new Turbo Express screws are to start, place, and remove. They are an all-around improvement over the old model. Only time and extended use will tell how durable they are compared to the old model and competing products."


Bottom line? You can get too anal about some things :) I am about ice screws for sure. To some extent it is personal preference and what you are most used to climbing with. Between the BD and Grivel the difference is little. Obviously I have a preference and I am sure the BD crew cringes and roll their eyes, rightfully so, when I post something like this, while Gioachino @ Grivel rubs his hands in glee.


The newest generation of ice screws are amazing. In many ways they have opened up much of the new mixed terrain and allowed the old "classics" to be done faster and much safer. There are no losers here.
Tuesday, May 22, 2012

Cycling and Hairstyles: Long vs Short

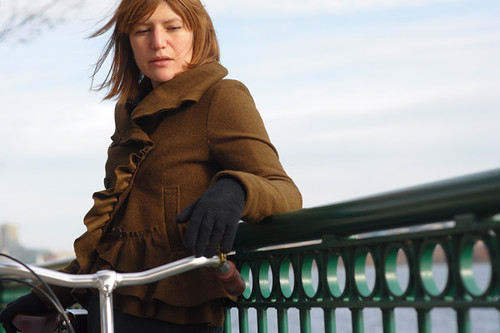
Charles River, Late Autumn

This morning I received an email from a reader asking whether I prefer long or short hair for cycling. Short answer: Long!


Last summer I chopped my hair for the first time in nearly two decades. While I didn't do it for the sake of cycling, I did expect short hair to be easier to manage for someone who rides a lot compared to my previously unruly mane. Surely it would feel lighter, be less prone to getting disheveled and sweaty, be easier to comb. Lots of active women have short hair, so this logic made sense.


But oh how wrong I was.You know how sometimes you have a bad hair day? I feel like I've had a bad hair year.While I like the look of my bob and it was nice to have a change, as far as cycling it's been annoying and fussy. Not long enough to fit into a pony tail, it is long enough to fly into my eyes when I ride unless I use lots of pins. This includes the times I am roadcycling and wearing a helmet - loose strands won't stay under the helmet, but fly in my face unless I remember to pin them down. Post-ride maintenance is harder as well. When my hair was long and it got disheveled or tangled after a ride, I could simply put it up in a "messy bun" and it would look decent enough. With short hair there is no way to hide the mess; looking presentable after a sweaty or windy ride is a challenge.


So while it may seem counter-intuitive, my experience as a cyclist has been that long hair is easier to deal with: With or without a helmet, I can just tie it back or braid it and forget about it. Now that mine fits into a pony tail again, I am ecstatic and feel like I need to write a note to myself with a reminder to never cut it again. I could see how a buzz-cut or pixie cut would be low-maintenance, but my chin-length bob has been anything but.


What are your thoughts on hair maintenance and cycling? Have you changed or tweaked your hairstyle as a result of riding a bike?

Thursday, May 17, 2012

Wordless Wednesday :: Stone's Trace

The Tavern at Stone's Trace. Built in 1839. South of Ligonier, Indiana.

Bartering at the encampment.

Photographs taken on September 6, ...
Copyright © .. by Rebeckah R. Wiseman.

Saturday, May 12, 2012

Zinnas

These zinnas seem to be the color of the sunsets we have been having.


Wednesday, May 9, 2012

Ed Cooper on Deltaform!

Many of the current generation of climbers may not know the name. But you should! Ed Cooper was climbing things years ago that many of us still aspire to today. He was likely there first either taking pictures or climbing some thing that most have not seen in North America yet unless you have gotten off the beaten track. FromDenali andEl Cap in the 50s to the "black hole" on the other side of the Canadian Icefields in the '60s. I am honored to present Ed's commentsand photos of Deltaform here on the blog. What a treasure, enjoy!


Interview with Ed here:

http://www.7photographyquestions.com//01/p35-show-notes-for-mountain-photography----an-interview-with.html

His website is here:http://www.edcooper.com/mountains1.html

Make sure you dbl click on the wonderful photos!

Ed's comments,

"I wouldn't describe Deltaform Mountain as an especially beautiful or aesthetic peak, but it is certainly an awesome mountain with a raw savage feel to it. It makes a great photographic study. Attached are several views of it, some with nearby peaks.They were all taken with a 4x5 view camera except for the view from the top of Mt. Lefroy, which was taken with a 2 ¼ x2 ¼ square folding camera. Low-res images are

included here, but the original scans are close to 300 megabytes each, enough to blow the images up to 30x40 inches and still maintain 300 dpi. Considerable restorative work was required on all the images, as over time the colors had faded, and fungal spots had appeared on the film emulsion."


"The north face has made my anti-bucket list; that is, I've added it to places I would rather not be. I have recalled two interesting anecdotes about this area."


"About the time the images taken in 1971, there was a fatal accident in the couloirs between Peaks 2 & 3 of the Valley of Ten Peaks. A climber was killed by a falling rock careening down the couloirs while he was ascending toward the Neil Cogan Hut located between Peaks 2 & 3. Sometime later, I happened to run across a climber that I knew, and he was very surprised to see me. He said, "I thought you were killed in the Valley of Ten Peaks area". It turns out that the climber that was killed had the last name of Cooper."


"The photo taken from the top of Mt. Lefroy has an interesting history behind it. It was the only time in my life that I have had a powerful premonition about a climb. This was a period in my life where I was exploring my inner self, with periods of intense meditation. In Augustof 1971, I met up with and joined a group of 5 other climbers to climb Mt. Lefroy.


We approached the Abbot Pass Hut via the "Death Trap". The next morning we headed out and traversed out below Mt. Lefroy, The unofficial leader of the group pointed up a snow slope that led directly to the summit with no interruption by rocks. He indicated that that was the route.


One look at it and I had an immediate foreboding and knew that I couldn't go that way. I expressed my feeling to the group, and one of them agreed to go with me up another route, close to rocks, to the right of the other climbers.


As we proceeded upward, we noticed snow conditions deteriorating rapidly due to the warm sun. Snow was starting to slough off and slide. We stayed as close to the rocks as possible and actually climbed on them where feasible. It was during this time that we heard some commotion and shouts off to our left, where the other climbers were. Once we had reached a perch where we could look to the left, we saw the other

four climbers near the base of the climb. It was obvious they had been caught in an avalanche.


There was nothing we could do at this point, as it was too dangerous to descend even the route we were ascending. At least two of the climbers were moving around, so we knew that they, at least, would be able to get back to the hut at Abbot Pass and call for help.


To make a long story short, we reached the summit (where I took the picture) and then proceeded eastward over unknown terrain to find our way down. We weren't prepared to follow a new route, and we wound up traversing many ledges below cliff faces in an attempt to get back to the hut. We had to rappel a few times. At some point we were aware of helicopter noise, which came in to rescue the most severely injured of the climbers.


We arrived back at the hut just as darkness was closing in, thankful that we had chosen a different route!"


Paradise to Muir -

December 29th,

I just did a nice check on Camp Muir this morning. I left Paradise at about 9:00 a.m. It was a little chilly. I was really surprised how few skiers were actually out. Kudos to the brave soul who marched up the Nisqually and skied the chute solo. Style.

First things first. Attention everyone. There was a wicked layer of surface hoar that didn't get any sun action today before the clouds started rolling in. It's going to get buried. There are all sorts of facets in the snow in the top 20 cm. What's worrisome is that the surface hoar is growing on a layer of sun crust. Underneath the sun crust is another layer of facets. Check out the snowpit profile.


Click on the image for a better, more readable size.

Expect these faceted layers to remain intact on all aspects for a while.


So the rest of the trip to Muir was outstanding. Skiing was 7 out of 10, for the windswept snowfield, anyway. The new snow that is forecast should make the skiing even better.


One thing I want everyone to be aware of is what we call the "Ant Trap". Remember that sand pit that Luke got thrown into by Jabba? Well, this is kind of like that.

It's located right next to McClure Rock. Click that picture to the right and note the coordinates on the bottom of the photo: -121.724123 46.808050 (WGS84). Plug that into your GPS and avoid it like the plague.

Many people have been eaten by the Ant Trap and more than a few have broken bones because of it.

Things are looking good at Camp Muir, albeit there is a lot of snow. Remember you'll have to dig your way into the upper half of the middle toilet. So plan on a little shoveling before you are moved to use it!


Also, remember if you're coming up to climb, to stop at the Paradise Old Station (the A-frame in the upper parking lot) and self-register. You can also pay the 30 dollar climbing fee to the 'iron ranger' there as well.

A storm was quickly moving in, so I had to ski-dattle. Down at Paradise, the parking lot is completely full! Hundreds of cars and sledders.


December 23rd, - Sweet Turns at Paradise!

This is it. Finally our snowpack at Paradise is back to normal at 78 inches. The rain from the last warm spell has stopped and we have up to 18 inches of new snow that has consolidated and another 5 inches of pretty light snow on top of it.


I started up the road this morning after we opened it at around 08:00 am. The light on the mountain was absolutely spectacular. It was clear and there was a little bit of surface hoar when I went to the weather station this morning. Here was the weather obs:

High: 22 Low: 16 Current: 22 Precip: .02 New: Tr Total Snow: 78" Winds: N @ 3-4.

We had our morning chores to do, cones in the parking lot, bumping sign andbamboo in the snowplay area, then folks started coming in droves.
The snowplay area is open and the runs are fast. However, because there's relatively little snow, we can only put one run in. The lines are a little long. Remember to get out of the run when you've come to a stop!

About noon we headed up towards Pan Point. What's this? It's noon at Paradise on a sunny day and there's no tracks? Where are all the skiers? Gary Voigt was up making turns in upper Edith Creek below McClure.


We've been telling people for years that the right way up Pan Point is in the trees on the nose. However, sometimes I think you're better off just going up the gully. We should've. The south facing part of the nose of the ridge was a little wet and heavy. It was starting to crack as we got onto steeper ground >40 degrees.

Always evaluate your own avalanche conditions!


We crested the ridge and decided to head for the top of Pan Point at around 7200 feet.

I was still surprised to see no tracks up above us since we had such a late start and the Paradise parking lot was FULL.

Whatever, the more powder for us.


Well, the way down was fabulous. My favorite run is to cut underneath McClure Rock. It's a little less exposed to the cliff bands around Pan Point. I rarely find avalanche conditions out this far. However, I did notice a crown feature on those cliff bands back down towards Pan Point. East facing, steep, ridge top... no surprise.

However, out where we were, the snow was outstanding.

Once we hit the flats to the east of Pan point, we traversed down the top of Mazama Ridge until we got to a slope locally known as Bundy's Blunder. It's just upridge of Sluiskin Falls. There was some slide deposition on it from the sun action today. It was only 4-5", but wet and heavy. It was enough to carry us, so we traversed out a hundred yards to the right and merrily made sweet turns all the way to the Paradise Valley Road.

Here's the latest weather history comparison:

Date 12/23

Max Recorded Snowdepth at Paradise 166 inches

Year of Max Recorded Snowdepth at Paradise 1916

Historic Average Snowpack at Paradise 77.9 inches

Current Snowdepth at Paradise 78 inches

Percent of Normal 100.13%

Percent of Historic Max 46.99%

Average Hi Temp: 32

Today's Hi Temp 22

Average Lo Temp: 21

Today's Lo Temp 16


Come on up! It's good!


Leavenworth Ice ..

Jennifer was supposed to work Christmas and Christmas Eve, so I was trying to find something to do. I successfully wrangled Ryan and Dylan to be followers and climb an ice line up Icicle Canyon. I was hoping that the recent warm weather didn't destroy it, and we would be rewarded with an early Christmas present to ourselves.

We took a casual start and arrived in Leavenworth around 10am. The beauty of this route is the "ten minute" approach. So we readied ourselves at the car and hiked into the woods. The route was easy to find having done the trail to Condor Buttress earlier this year.

The route in Spring

Within ten minutes of hiking we were at the first step of the route. Since it was a bit steep, we opted to hike past it and start at the second step. So we roped up and started with the second step. The second step had an easier line on the right, and a steeper line on the left. Since it was the first lead of the day, and I wasn't sure how strong the ice was, we kept to the right side. After the step there was quite a bit of flat stream so I set a belay and brought Dylan up who then brought Ryan up. We unroped and hiked up the stream bed a distance before reaching the next step. While this step was a solid WI2, it was short and we decided to solo it as we knew there was more hiking above it.

While the climbing so far was generally easy, the ice conditions were quite variable. As I suspected, the wet warm trend from earlier in the week left the ice poorly bonded to the rock in some areas. A section of the first step had a hollow 3' square area surrounded by well bonded ice. This next step that also had areas of poor ice as well, but fortunately I used the pick holes from a soloist (who had passed us) so as not to damage the ice further when I went up.

Some more hiking through a now brushy and less open creek bed got us to the next step. This is where the real climbing starts. From the base of this next step, I thought I could make it to the base of the final step in one rope length. But once at the top of this step, there was a little more distance before another penultimate step. So I led to the base of that step and brought the guys up. I then led out on the penultimate step which was really fun. There was a bit of snow on the ice and there were some hollow sections, but I was able to sink screws in it fairly well including a 19 cm screw. Once at the top of that step I was in the basin below the final step and proceeded to the ice to build an anchor. Unfortunately, the ice on the final step was thin and I couldn't sink screws well. (I was out of shorties.) I had to use 21cm screws not fully sunk as the anchor.

I brought Ryan up and he belayed Dylan up. We discussed the final pitch when we were met with another soloist. We chatted with him a bit. (Turns out the other soloist was his buddy.) And then we let him go ahead of us. The left side of the final step starts with about 12' of 85° ice. It has been climbed as it had pick marks. The right side had also been climbed usually on the far right. I decided to take something right up the middle where I knew there would be pro (wrong) and it was a bit steeper than the right side.

I started up heading toward an icy rib that looked like it offered good protection. Unfortunately, it would not take a screw all the way and I had to tie it off. The stance also was not great for placing the screw and I really worked my calves while placing it. Just past the screw the ice was tympanic and did not feel comfortable, but this passed. A little further up and I found a rest stance, so I placed another screw in shallow ice. My calves were really getting worked and I decided instead of heading a bit to my left for a short step, that it was time to head straight for the top. I worked quickly and methodically through the final bit of the pitch and was on flat ground heading for a large Ponderosa. Once there, I made it my anchor and brought Dylan up. He belayed Ryan up while I sought out the descent or a possible continuation.

Most parties stop where we did and descend. This is the option we choose after the bits of ice above our location didn't seem to offer any great climbing (that we could do.) So we headed down, following the trail of footprints in the snow. Most of the descent was fine to do in bare boots, but there were a few icy sections that would have been nice to do in crampons. Not sure it would have benefited to leave them on the whole descent, but Ryan did and he didn't complain.

This was fun route, but the climbing really starts farther up and the first few steps are warm ups. Due to the short approach and the length of the non technical portions, it is an easy day trip. (Car to car for us was around six hours.) The ice wasn't in the best condition, and was hacked out in a few places as well. (Very different from how we found The Goatee.) The climbing on the upper three pitches was great, and I'd go back to do this again.

My pics are here.
(Dylan took pics, but I haven't seen them.)

Arc’teryx Alph FL Review


"The abseil off the Aiguille Du Midi Bridge into the Cunningham Couloir"

Nice Toque there Dave!


Arc’teryx Alph FL Review by Dave Searle.


I’m not really a huge fan of waterproofs
for climbing being as most of the time I don’t climb in the rain. As Mark Twight eloquently put it in Extreme
Alpinism “if its raining in the mountains, you should just go home”. I agree.
However summer alpinism isn’t that predictable and more times than I can
count I have had a good drenching on the walk out.


When I first laid my hands on the Alpha FL
I knew it was going to be a winner and is probably going to accompany me on
lots of my alpine adventures. I have
been using it for a few months now ski touring and steep skiing and it’s worked
really well. It really is no frills. No
pit zips, only one generous chest pocket, no wired hood and even the zip pulls
are just bit of coloured dental floss! It doesn’t even have a zip gutter on the main
zip because the zip itself is waterproof enough. I was a bit worried that the zip might not
stand up to serious windy wet weather but to be honest I don’t really
care. Wind is one thing and rain is
another but together and you wouldn’t see me leaving the house for much more
than a dash to the shops. If, however, I
was climbing in Scotland and I knew it was going to be grim (which it normally
is) then I might pack something a bit more bombproof but that’s not what this
jacket is trying to achieve. Even then I
still think I would grab the Alpha FL because it has a good balance of being
burly without all that extra useless stuff….like hand warmer pockets. Who needs hand warmer pockets when either
climbing or belaying? I don’t and I think if you ask yourself then you’ll
probably agree you don’t either. Extra
unnecessary weight for sure. Ueli
agrees…..


Three layer Goretex in it's own stuff sack.


Active shell is gore’s most breathable
fabric and it hasn’t let me down so far.
I’ve yet to reach the point of thinking “I wish I had pit zips” without
just whipping it off and shoving it in the tiny stuff sack provided. The outer fabric on the Alpha Fl seems pretty
sturdy to. Not a mark on it after tree
skiing and scrabbling about on granite for a few months, the two things which
are guaranteed to end the life of a lightweight waterproof prematurely.


The hood is good and it of course fits over
a helmet well and reduces down on a bare head neatly. The chin piece isn’t as
high as some other jackets I’ve seen but it still covers enough. As I said it doesn’t have a wired peak but it
is stiff enough for that not to matter.
The arm articulation is great, the sleeves don’t ride up my arms at all
and the hem stays put. Exposed waist and
wrists is a common problem I face with jackets due to my disproportionately
long arms.


So it’s not the lightest waterproof jacket
in the world at 295g but it isn’t that far behind either! I defy any sub 250g jacket to withstand half
of what I have put this jacket through in two months. A little extra weight can go a long way in
durability for sure.
Definite thumbs up from me here. Oh and purple is the new green I have been informed.J


Dave using the Alpha FL in the Cunningham Couloir


More wildflowery

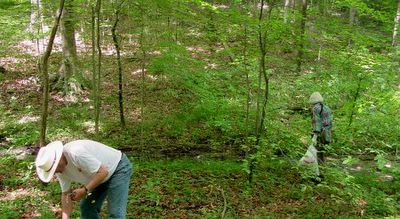
Yesterday I spent time with other wildflower nuts in the woods. We plucked a few where there were many, and rescued some from kudzu, Japanese honeysuckle, and men with bulldozers.


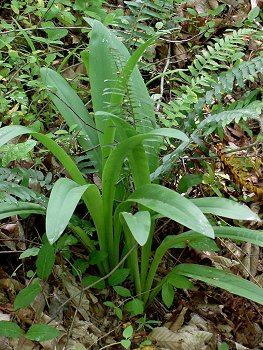
I came across this plant that I was not familiar with. I believe it may be a spider lily, Hymenocallis caroliniana.


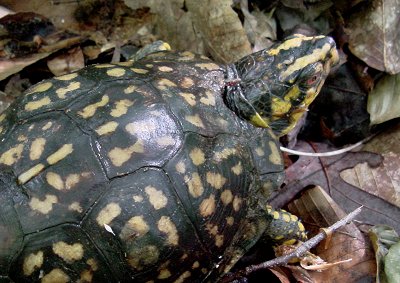
Saw this guy. Eastern Box Turtle, Terrapene carolina.


Saw a couple of groundhog dens in the kudzu but didn't photograph them, as I was in danger of being left behind and it was too sunny anyway.

When we were done we appreciated Dan's beautiful garden.

OK we were just nosy.


Inside a foxglove (Digitalis purpurea) there are secret messages to bumblebees.


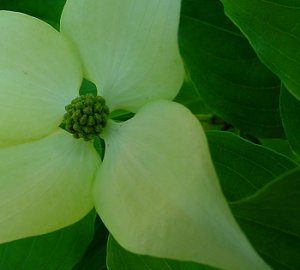
An unusual dogwood.


Sweet Williams (Dianthus).


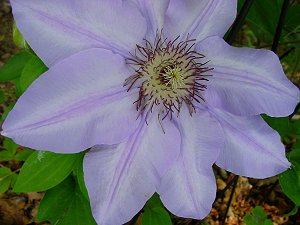
Clematis.


Another Clematis. Most people around here seem to say it with the accent on the first syllable, but to me it sounds better on the second.

Weight Distribution Mysteries

Loaded Rivendell, Rockport MA

One thing that continues to mystify me about frame design, is how different bicycles react to weight distribution. Over the years, I've really found this aspect of a bicycle's handling to be a wildcard. My Rivendell Sam Hillborne is built like a typical mid-trail touring bike, which, it is said, makes it optimal for carrying heavy loads in the rear but only moderate loads in the front. However, I prefer to ride this bike with an enormous handlebar bag, and it does very well with it. It also handles well with a saddlebag and panniers, but interestingly the handlebar bag - with the same amount of weight in it - does not appear to affect speed at all, whereas the saddlebag does a bit. If I am going on a fast ride, Iremove the saddlebag butdo not bother removing the handlebar bag. All of this is just fine with me, because I find it far more convenient to keep my stuff in the front for easy access. But it goes against my understanding of the way a bicycle like this is supposed to react to weight.


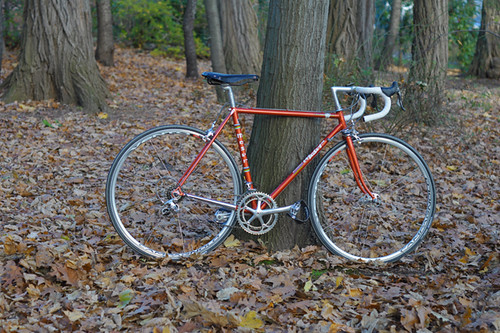
Francesco Moser 2.0
Then there is the Moser racing bike, which reacts badly to any weight I put on it at either end. The front gets twitchy with even a small bag attached. And with any saddlebag larger than a tiny wedge the bike feels distinctly rear-heavy. A few times I've affixed a mid-sized saddlebag so that I could carry my camera, and it felt like trudging through mud compared to the speed this bike is normally capable of. On the other hand, a full water bottle on the downtube (the bottle weighing about the same as my camera) has no effect, and neither does my own weight gain when I stuff my jersey pockets with all the things I would have otherwise kept in a bag.


Riding bikes like this has made me understand why some cyclists chose to ride with backpacks instead of baskets or panniers - some bicycles simply do not handle well with weight on either end, but do fine when the weight is part of the rider. This is one reason the argument "If you want to lighten your bike, lose some weight" does not make sense to me.You cannot simply take the combined weight of a bicycle, its accessories and its rider, and assume the handling and speed will be the same as long as the total remains the same.


My first city bicycle - a Pashley Princess - came with a huge front basket, but it did not handle well for me when I put things in the basket. Eventually I removed it and attached a set of rear folding panniers instead. With that configuration the bike handled much better, and faster. When I carried weight in the rear, I could detect no difference in speed, even with a full load of groceries.


Bella Ciao, Fastrider Pannier

On the other hand, the Bella Ciao city bike I now ride - while faster than the Pashley overall - is more sensitive to weight in the back. The handling doesn't change, but I can feel a difference in speed depending on how heavy the load I am carrying is.


With pretty much every bicycle I've ridden over an extended period of time so far, I've noticed some sort of relationship between weight distribution and handling, and it is not always a logical one - or at least not obviously so. I am sure there are lots of factors contributing to these effects, and these factors are just too nuanced to be obviously discernible. It's interesting to figure this stuff out in the process of getting to know a bike.

Saturday, May 5, 2012

On your mark, get set, ready?

It's almost time for the Opening Ceremonies! The Genea-Blogger Group Games (henceforth known here as "The Games") officially begin on Saturday with genea-bloggers from around the world participating. Consisting of five categories with various tasks to be performed, The Games will certainly be a challenge. I'm looking forward to these games and "meeting" some of the new Genea-Bloggers. I'm also looking forward to those "other" games that will be going on at the same time!

The five categories of "The Games" (and my goals) are:

1. Go Back and Cite Your Sources!
One of my resolutions this year was to "clean-up" the sources in my databases. It's one of those items that hasn't been started yet. I'm planning to download Legacy 7.0 soon and am hoping their new sourcing templates will help make the job a bit easier.

2. Back Up Your Data!
I'm fairly confident that I'll be able to accomplish several of the tasks listed but the last two are way out of reach for me (too much stuff has been collected over the years).

3. Organize Your Research!
I've slowly been working on this but still have a long way to go. My major project this summer has been organizing and scanning family photographs. All those genealogy documents are still waiting for me so maybe "The Games" will kick-start the process.

4. Write, Write, Write!
I think I'll go for the gold on this one! Which three will it be?

5. Reach Out & Perform Genealogical Acts of Kindness!
Three should be doable here as well. I like gold. But Diamonds and Platinum would be nice too.

A special "Thank You" for all their work goes out to Miriam Midkiff, Kathryn M. Doyle, and Thomas MacEntee. They are responsible for organizing the Genea-Blogger Group Games and I'm sure they have expended considerable time and energy in doing so. In addition, footnoteMaven is also to be commended for providing the very fine logo being displayed by participants. fM has also created the "medals" that will be awarded during the Closing Ceremonies.

=+==+==+==+=

Updated 6:45 PM - Check out the Opening Ceremonies of the Summer .. Genea-Blogging Group Games: The Parade of Delegates for a listing of all participants and the flags that represent them!

Tuesday, May 1, 2012

Fountain


I do not remember this large fountain being in the Patio Market the last time I was here but it looks like it has been here forever. Inside of it somewhere was a pump that kept the water constantly circulating so that it looked like the bucket was always spilling water out.