Wednesday, May 29, 2013

Preparing for Long Distance Rides

Dolomiti

They say a good rule of thumb when working up to a long distance ride, is to ride in a week the number of miles you plan to do in a day. This morning I looked at my wall calendar (which now resembles a numerology chart) and realised that I've ridden around 200 miles over the past week, Saturday to Friday, distributed over the seven days as 16-60-0-0-24-40-60.


Today I feel all right. A little beat up, but no more than usual. Still, I am not convinced that doing this milage over the course of multiple days means that I can ride even 100 miles in one go. After a 60 mile day I am depleted to the point that in the end I cannot imagine being in the saddle a second longer.


And I take too many breaks. For instance, yesterday's milage was divided into: 8 easy miles alone/ break/ 20 hilly miles with a fast partner/ lunch break/ 24 hilly miles with a fast partner/ break/ 8 easy miles alone. Is it even fair to call that a 60 mile ride? The longest I've done so far in a group without breaks has been a measly 35 miles.


I don't like the idea of "training," and prefer to think of these rides as preparation. I never want to get to the point where I hate being on the bike and have to force myself to ride. What I like about the past week is that I've managed to not only put in 200 miles, but to feel good about it. What I don't like, is the limit I am sensing: After 60 miles I just don't feel that those remaining 40 are in me.


How do you prepare for long distance rides? Is it normal to feel a daily milage ceiling past which you can't seem to advance?

A 2nd look at ice screws....

I had a chance to climb on some ice this winter thatwasunique. Was to me anyway.


I had thought I had seen hard black ice previous. Uncomfortable but workable. But some of the stuff we got on in Chamonixwas damn near bullet proof. And I actually know what real "bullet proof " is by USDOJ standards. This was IIIA no problem. Ceramic plate hard. Going for a solid III or IV rating hard. Hard, cold and dry. Some times as much rock and sand, as ice.


I had thought over time Ipretty muchfigured out how to get a decent belay on ice quickly. Typically takes only a few minutes and I'm done. Nothing fancy mind you. Two screws, two tools to the hilt. Clove the screws on a good day, clip a tool out of the loop may beand were are off to the races. Nothing fancy. I can do fancy just don't chose to generally.


Only once have I failed to get an anchor...that in the upper bowl on Slipstream. Even in the old days when we already knew the screws we were using wouldn't work in some ice we'd just keep climbing in a similar situation.Never have I spent an hour trying to get a belay on ice...until this winter.


Matt (high middle of pic) above tied off screws and well deserved rock pro....finally.

Likely obvious but alpine ice isn't waterfall ice.I spent an hr we could ill afford trying to get two decent screws into the belay from where this picture is taken. You might reasonably ask why not rock gear there? And it would be a reasonable question. We had just climbed 250m of hard, (like rocks are hard)north facing ice with a foot or so of fresh snow on it and my patience was wearing thin. I actually climbed over to the rock thinking I'd be able to get something inwhere the picture is, easily. ( I seldom can't in a minute or less on rock) It was prefect granite for chrimney's sake! By the time I realised rock gear wasn't going to be easy I was determined to grovel, dig or full on excavate toget ice..any ice.

What ice that I could/should have gotten a screw into normally I was coming up dry. I'd get a bite, a couple of 1/4 turns to a start. Then the ice turned to theconsistency of riceand the screw failed to bite as the tip, plugged up with ice. Over and over again. Clean the tip and try, clean the tip and try. Nothing in the tube.

Six holes.....yes I counted. And many failed ice screw placements later I gave up (i gave up!?) ...tied the two shitty screws off, covered them with snow, reset my tools, tied them off and said "climb". Surely not not all that thrilled with the screws or the time wasted. We should have just started climbing together so I would/could have found better ice. Bad, really bad, judgement call on my part in several ways.

I had covered the anchors because I knewmy partner was not going to bepleased. With the gear or with me. Hell! I wasn't pleased and at this point was feeling like a total failure. WTF happened here? A couple of things.


The ice was really old and hard. It was shallow. I dinged 3 screws trying, I know. But and here it comes....the screwswere all new (as in brand new) BD Express screws. I had decided to make a real effort to use the BDs in the alpine on this trip. Lighter by a few grams, rack easier and all.......

Even if the BD's are a bit harder to place, which has been my experience over time, it is only alpine ice. How hard can it be? "It aint going to ever matter."


Ya, that was a dumb answer. And this was a "easy" climb. Just the fact that the ice wasn't being cooperative made it, well, not so easy.


A number of things stood out to me on this particular climb. New snow on the approach and the easy angled ice,the cold temps and the ice quality.It was hard to get takers for a trip back to that set of gullies ;)


What I did fine when I made it back the next week was...similar snow conditions. And thesame ice conditions. Likely a tiny bit warmer but that would be only a guess and if so notby much.


But I brought a majority of Grivel Helix screws this time. Fool me twice and all. Amazingly enough...every screw was sunk to thehilt first try. Nothing tied off and no time wasted on bad anchors.


To be fair. I knew where I was going, where there was good/better ice on routeand whereto avoid another dry hole. But still......if I didn't think there was a difference...a big difference..I wouldn't be writing about it. With a little help my partner was able to climb"the obvious line" that wasn't all that obvious first time around or for the localsthat were following us that day.


I have a full rack of the newest BD and Grivel screws and no horse in the race.. YMMV but that is my 2 cents from this experience.


Looking down from that same belay....great snow ledge anyway :)

Sadly, no, the beautiful and warm sunshine never touched the belay.

The Straw Brothers

Alex:


Just say for example you were from Colorado and youhad dual U.S. - Australian Citizenship.

Then imagine you were fanatical about snow boarding and climbing.

And your older brother was too.

Take into account that Colorado has aguably some of the best powder in the world and is not such a shabby place for climbing either.


Then lets just say you chose to live most of your life in Brisbane.

Either there's a girl I don't know about, or he's running from the law.

Eric: As above, but 3 years older.


Good choice boys?


Eric:


..The Straw Brothers taketo "Black Leather Dungarees" at Coolumand find out all about the hype, the pump, and the pure excitment of one of the Cave's best and highest.


..


Alex on "the slab" section of the route. Not a slab. Just not as crazy steep.


Whether youclaim to be a boulderer or a boarder, you are going to need a beanie.

Otherwise who's going to believe you?


Climbers, don't just dream about being as cool as these guys, do what I do- copy their look.

Get the "Climber Beanie", hand made from un-dyedAlpaca and Merino wool, atRed Phoenix Emporium


Or at least click on the link to seethe boys represent Red Phoenix,the uber cool, cult style outfitters to the very chic.


Good choice boys.

jj


Tuesday, May 28, 2013

Embracing Wrinkles

Linen Suit + BikeOne question I am often asked about cycling to work, is how to avoid wrinkles on business and formal attire. I don't have many pictures of myself dressed up, but I do cycle in suits and dresses that fall into the business/ formal category. And rather than avoid wrinkles, I tend to choose clothing that either doesn't wrinkle easily, or that is meant to look wrinkled. This habit is a hold-over from a life of constant travel combined with a hatred of dry-cleaning and ironing boards, and it lends itself well to cycling. Here are some suggestions I can make from personal experience.

My go-to fabric for looking presentable in the warmer months is linen (shown above). I own several linen skirt and pant suits, and I mix and match them to create a variety of outfits. People tend to think of linen as a limited, "afternoon tea at a resort" sort of fabric, but in fact it comes in many weights and textures. A dark, crisply tailored linen suit can look formal, while a pastelgauzy linen dress can look whimsical. But what all linens have in common is that they actually look good wrinkled; wrinkles are part of their "personality." That's what makes them great for tossing into a suitcase, and it's also what allows me to get on and off the bike as many times as I want without worrying whether my skirt needs to be frantically smoothed out before a meeting.

Wrinkled SilkI am also a fan of "twist-dried" designs. There may be a formal name for this process that escapes me, so someone please help me out. But what I mean is that there is a style of shirts, skirts, even evening dresses where the wrinkles are part of the garment's very design. This is achieved by drying the article of clothing in a wrung-out, or twisted manner. The resulting wrinkles are clearly intentional. They add a sense of structure and the illusion of subtle colour variation to the fabric once it is dry. Typically, the twist-dried effect is produced by the manufacturer, but you can create it on your own by simply drying any shirt, skirt, or dress (crisp cottons and silks with no pockets work best) in this fashion. Having wrinkles as an inherent design element of your outfit eliminates the need to worry about them.


To some extent, the same idea can be generalised to textured fabrics. Tweed, seersucker, lace, embroidery - the texture both disguises wrinkles and somewhat prevents them from forming.


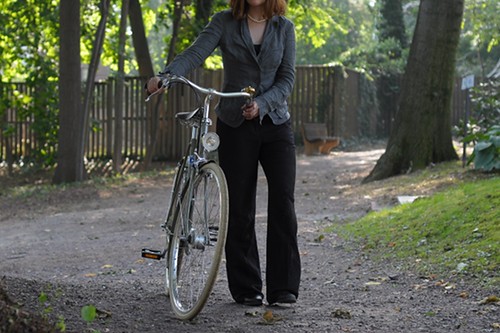
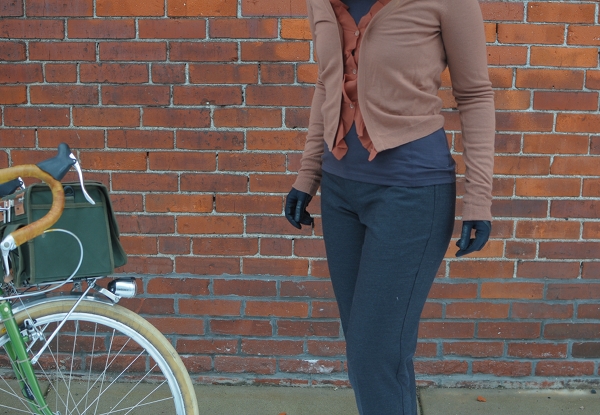
If your dress code limits you to more conventional suiting, I have found that wool skirts and trousers tend to be more forgiving as far as wrinkling goes than other fabrics. They still wrinkle, just less so. Not getting on and off the bicycle saddle every time I stop (but leaning the bike and putting a toe down instead) has been helpful in preventing wrinkles from forming as well.

Of course for dresses there is wool jersey, though it has become increasingly more difficult to find ready-made. I've been working with a designer to help create a cycling-specific dress with a couple of interesting features, and one reason we chose jersey is for its non-wrinkling properties. While I prefer wool or bamboo jersey, cotton jersey and various artificial blends work well in this respect also and are easier to find in stores.IbexandIcebreakerhave begun to make wool jersey dresses, and while theirs tend to lean toward the more casual, it's a promising sign. The nice thing about jersey fabrics, is that they not only resist wrinkling, but also have some give to them, allowing you to move easier on the bike.


Gazelle A-Touren, Leather GripsOne last suggestion I can make for those whose clothing is wrinkle-prone, is to try throwing a coat on over the outfit. Granted, this works best in cooler weather, with stiff wool coats. But in warmer weather even a thin trenchcoat can be helpful.

While cycling to work is easy if your typical wardrobe already lends itself to it, I think it's important to address the concerns of those who would like to ride in their regular clothing but, for whatever reason, find it impractical. Sometimes it is a matter of having the right bike or accessories, other times it's a matter of making minor alterations to your wardrobe without inherently changing the way you dress. What are yours strategies for dealing with wrinkles and other forms of dishevelment that cycling may impose on your clothing? If it were crucial in your line of work to always look crisp and impeccably groomed, would you still ride to work?

Monday, May 27, 2013

Owachomo Bridge, Newspaper Rock, Goosenecks State Park


Staying in Blanding, Utah tonight. After a day filled with sunshine, spotty rain, occasional snow showers, and some pretty good dust storms (not to mention some REALLY cool clouds throughout the day), I caught a nice sunset over Owachomo Bridge at Natural Bridges National Monument. Was hoping to photograph some stars over the same bridge, but it was too cloudy.


Some other highlights from today: Stopped by Newspaper Rock in Canyonlands National Park, an amazing rock which has probably the highest concentration of petroglyphs of any single rock in the Southwest. I also drove through some intense rain today, followed by some amazing skies as the storm broke up. As I drove North from Monument Valley I took a quick side trip to Goosenecks State Park to photograph the sky above the bends in the San Juan River.


ATV Time

We took the ATV's out the other day after a rain, to see how bad a shape the roads were in. Nothing to bad but a few were washed out some.

Thursday, May 23, 2013

Cat pile


Doesn't look that comfortable to me.

Ginger is the cat who likes to hide his face. He's always trying to burrow under, squeeze behind, or tunnel through something. One night this week I caught him rooting into the back of a chair. There was a crease in the fabric that evidently resembled a secret passageway.

Wednesday, May 22, 2013

Welford - Sibbertoft - Welford

Barry led this walk, with me and Gordon. Almost 10 and a half miles, and the weather was fine, though blustery, and quite cold in the wind.


We parked near the school in Welford, on West St, and walked through Butchers Close to the High Street, past a couple of ex-pubs, and the Old Post Office, then turned left, past a development of new houses ( from barns) and across some fields, following a path, which joined the Jurassic Way, and funnelled us between hedges briefly. We followed the Jurassic Way through some fine scenery, across a tiny river - the infant Avon, of Stratford fame - and up past Sulby Lodge Farm, home of Shep the dog. Soon afterwards we met the Naseby Road, turned left and after Grange Lodge turned right along the path beside Welford Reservoir, then across the weir which divides it from Sulby Reservoir.


a kestrel


A robin watches as we wander by

The path left the water and went nor'nor'east, through a field showing plenty of evidence (humps and bumps and hollows) of the old mediaeval village of Old Sulby.


Part of Old Sulby, with the northern arm of Sulby reservoir in the background


The path crossed a track and then another field. Just after some buildings on the right the Jurassic Way turns east. We continued along as far as Sibbertoft, where we turned right and walked along the road which skirts the southern edge of the village, ignoring all turnings to the left, and turned right at a green where three roads converge. At a right-angle bend to the left, our path turned off to the right. There was a fair amount of walking through fields here, some of them muddy - the path was generally easy to follow, in a more or less south-westerly direction, cutting diagonally across the fields.

We were aiming for the small piece of woodland at the end of the reservoir's eastern arm. Through the wood, the path proved to be very muddy and wet, but at the other side we came out on to a decent track. It leads from Oak Tree Farm - which isn't on the map. The track leads up hill gently, and we had a snack break when we reached the gate by the Naseby road. A good choice - sheltered from the wind.


Across the road is the site of Sulby Abbey, founded in c.1155, occupying a considerable area, and frequently visited by Edward II. According to this site, the monks were not always perfectly behaved, and there are details of some of the punishments they were given.

In 1538, Thomas Cromwell was informed that'the papistical den of idle and utterly unlearned beasts at Soulbie' had beenbroken up.


Next downhill a bit, and over the mighty Avon again, then upwards and onwards to the A 5199. We seemed to be approaching the A14, closer and closer, noisier - but a few hundred yards short, we turn west and parallel to it, then meet the minor road which crosses it. We turn our backs on the big road, and after less than half a mile, past Welford Lodge Farm, we turn left again and head across country towards Hemplow Lodge Farm. This is a popular child-care nursery, if the traffic along the lane is anything to go by. There's a manicured lawn and mini-lake here, and the path could do with clearer signs.


We turned sharp right, and straight along the lane, past a house named the Hemplow Arms, straight on at the crossroads, and into Welford along West End.


Hora pars vitae - each hour is a part of life


1/29/10


That is the date of the very first C/T blog post. The comment was onice tool umbilicals.


Cold Thistle now enters its fourthyear. Amazing to me anyone drops by here. It is still fun so I continue with a little help from other writers (hopefully more writers) and the Outdoor Industry in general.


The blog hadn't hit 4K readers in a day or 10,000 readers in a month a couple of months ago. The last few weekshave been bumping at 6000 visitors a day and wentwell past 10,000 readers in January of '13 @ 115K.


Att that isexciting for me. Humbling as well and a responsibilityI take seriously.


Thanks for dropping by! Some fun stuff in the works coming shortly.


Tuesday, May 21, 2013

Tech bindings again?


I switched over to all techbindings for inbounds and out of bounds skiing on everything I own 4 seasons ago.. I have a quiver of skis and a boot quiver as well to cover the full spectrum of my own skiing needs.


DPS 138s in a 192cm to my 167cm lwtBroad Peaks.


Tech bindings are an acquired taste and not for everyone.

But if you have an interest in lwt high performance ski gear this is well worth a read:


http://www.earlyups.com/featured/gear-dynafit-radical-ft-12-review/#.UYE2hKqjXOw.facebook


or dig around in here as it is all done ontech bindings:


http://www.coaststeepskier.com/wphome/


http://www.getstrongergolonger.com/


Saturday, May 18, 2013

Canyonlands National Park


If you like the canyon country but the thought of the insane crowds at the Grand Canyon turns your stomach, then Canyonlands National Park is for you! Featuring canyon vistas no less impressive than those of the Grand Canyon, Canyonlands is a heavenly park. Near Moab, Utah the park is easily accessible by car. However, if you want to fully appreciate this park (something I have yet to do) you need to spend at least a few days here and explore the park away from the main road. Canyonlands is a vast park with many things to see, but it takes time to see them and appreciate them. On my next trip to the southwest I hope to spend at least a few days here.


Above: These 2 images are actually from Dead Horse Point State Park, a short detour along the same road that brings you into Canyonlands. Dead Horse Point is a beautiful place with impressive canyon views to both the east and the west, making it a fantastic location for either sunrise or sunset shooting.

(Above and below: A sampling of some of the views available from the main park road.)

Carlsbad Caverns


Well, my 6 week journey through the West is almost over... today was the last destination in my plans before heading home. That destination was Carlsbad Caverns National Park in southern New Mexico. After an awesome week spent in Bosque del Apache National Wildlife Refuge and White Sands National Monument with my friend Roger, we each went our separate ways... Roger headed for home and I headed for Carlsbad.


To be honest, Carlsbad was a spur of the moment decision for me. Since I still had some flexibility before heading home and Carlsbad was not that far away, I decided to head down and check it out. Boy, am I glad that I did! Hiking through Carlsbad Caverns was REALLY cool! I was a little disappointed when I arrived at the park, as the HUGE parking lot was almost filled to capacity. But, I drove all that way to see the cavern so I wasn't going to let the crowd deter me. I arrived at the park in the early afternoon and as it turns out its a good thing I didn't arrive any later than I did. While inquiring about the cave at the information desk the ranger told me they were closing the natural entrance in 5 minutes. So, I had to hustle to get to the entrance in time! I was part of the last group allowed to enter the cave and after our brief 3-minute orientation talk we were sent on our way.


The first section of the hike is VERY steep... the trail switchbacks down through the entrance of the cavern and from the top to the bottom there is an 850 foot elevation loss. "Weak knees are common" the ranger had told us, and he wasn't kidding! By the time I was halfway down my knees were already getting tired. After the first dozen or so switchbacks you are already deep enough down into the cavern that there is very little natural light, and you start to see the first of the artificial light sources that park service staff have installed along the trail. The trail, by the way, is superb. Park service staff have really done an incredible job of constructing the trail through this most forbidding of environments. The trail surface is very smooth and there are nice, sturdy railings lining both sides of the path.


After passing the first few artificial light sources a sign informed visitors that beyond this point, without artificial light, it would be totally dark in the cave and you'd be unable to see. The trail then continued down, down and further down. Switchback after switchback passed, and I soon began to question whether or not the 850 foot elevation number was accurate. It felt like I had descended 1,000 feet or more. Soon, though, the trail leveled out and I was at the "bottom". The hiking became much easier... with some gentle "rolling" terrain and a few short sets of stairs here and there.


Not long after reaching the bottom, the natural formations along the trail began to get a lot more interesting. During the descent into the cavern, the trail passed through some pretty cool and sometimes quite large "rooms", but the walls and ceilings were rather smooth and devoid of any interesting geologic formations. That all changed the closer I got to the bottom, however. Now there were stalagmites and stalactites interspersed along the trail. Walking along this path nearly 1,000 feet below the surface, I felt like I was in my own version of "Journey to the Center of the Earth"!


After walking for about a mile and a half, I arrived in the "Big Room", which is the showcase of Carlsbad Caverns. The "Big Room" is loaded with out-of-this-world geologic formations, and the trail does a large loop throughout the Big Room, passing within a few feet of many of these formations.


Above: Look closely at this image and you can see some people standing near the lower right corner of the image... this gives you an idea as to how big the cavern is!

The "Big Room" is the 3rd largest cave chamber in the Americas, and the 7th largest in the world. It is a natural limestone chamber which is almost 4,000 feet long, 625 feet wide and 350 feet high at the highest point. When you are in one of these larger areas of the room and you see the tiny silhouettes of other hikers in the distance, you really get a sense of how immense this cavern is.


After walking the loop around the Big Room and taking several pictures, it was time to head to the surface. Thankfully, there is an elevator that provides quick and convenient access back to the surface. After all the hiking I did around White Sands, and the hike down into and throughout the cavern, I'm not sure I could have climbed 850 feet back to the surface :-) Hiking Carlsbad Caverns was an awesome experience, one that I would highly recommend!


And so comes the end of my journey throughout the West. This is my last entry from the trip... all I have left to do is make the drive from southern New Mexico back to northeast Minnesota. My plan is to stay in Roswell, New Mexico tonight then tomorrow hit the road for home. I don't have any photo stops planned along the route home, so my next blog entry will probably be from the shores of Lake Superior once again. If you've been following along on my journey these past 6 weeks, I hope you've enjoyed the journey (and the images!) and I thank you for following along. Bye for now!

-Travis

Friday, May 17, 2013

The Master Builder: Mike Flanigan in His New Workshop

Last week we visited the new A.N.T. Bikes workshop in Holliston, Mass., and the Co-Habitant took a series of black and white photos of the excellent Mike Flanigan. My job was to take the digital test shots, which were mostly to meter light and try out compositions before the "real thing". So here are a few of these test shots, which A.N.T. fans might find enjoyable.

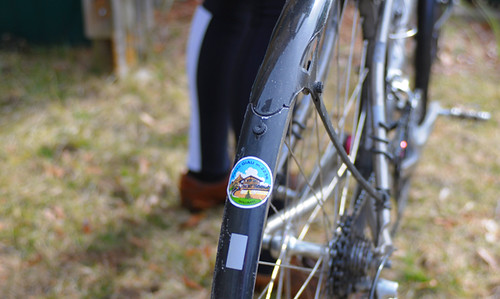
For those who are not familiar with Mike Flanigan, I do not think it is an exaggeration to say that he is a legendary figure in the bicycle industry. Not only does A.N.T. put out a truly unique product, but Mike's background is impressive in itself. He started out in 1989 at Fat City Cycles - one of the early pioneers in mountain bike design, based in Somerville MA. After Fat City was sold in 1994, Mike went on to co-found Independent Fabrication, another Somerville bike manufacturer that has attained international fame. And finally, in 2002, Mike branched out on his own with A.N.T. to pursue his unique vision of "not sport, transport".

Since discovering A.N.T. a year ago, I keep asking myself what exactly makes these bicycles so interesting and unusual? Others make TIG-welded frames. Others offer custom colours. And now that the concept of "city bike" has taken off, others build up bicycles designed for fenders, front and rear loads, and upright sitting. So what does A.N.T. offer that's different?

Ah yes - Personality. And I am not talking about Mike's own great personality. The bicycles themselves have a distinctly ANTian character that transcends the sum of their parts. A.N.T. bikes are the Meryl Streeps of bicycles, if you will. Yes, they are beautiful and their performance is impeccable - but there is something more, isn't there? And that elusive "more" is what we really find captivating.

And then there is the fact that Mike himself is a kind, generous and creative person, who sticks to his principles and follows his philosophy. It is endearing to hear the younger framebuilding generation in the Boston area speak of him. Everyone seems to have a story about Mike having helped them out at some point, or taught them something; he is somewhat of a patron saint around these parts.

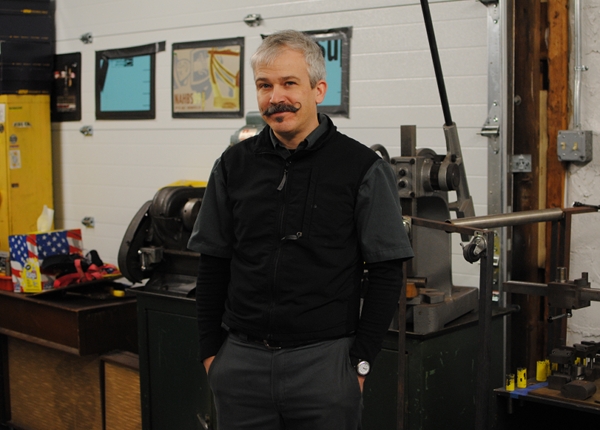
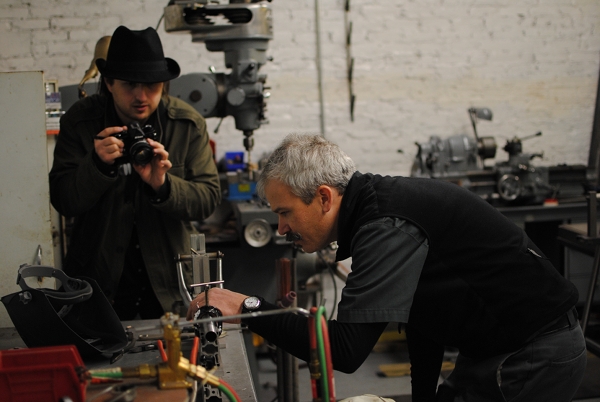
So that is the man we had the privilege to photograph last week, and we thank him for the opportunity.

The Co-Habitant is a photographer, and he is now working on a project that documents different aspects of the Boston bicycle industry - from independent manufacturers, to bike shop owners, to bicycle collectors. It is an interesting thing to help him with and I hope he exhibits the photos when the project is finished.

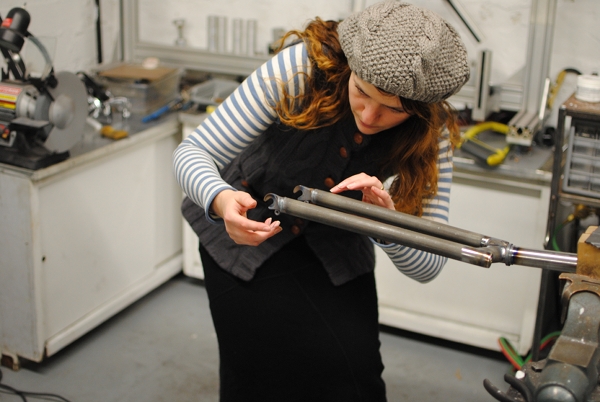
I enjoyed looking at all the tools and machinery in the A.N.T. workshop, and more than anything I loved examining this fork. It is a segmented fork that I believe goes on the Light Roadsters. There is something about the look of these that I find very cool.

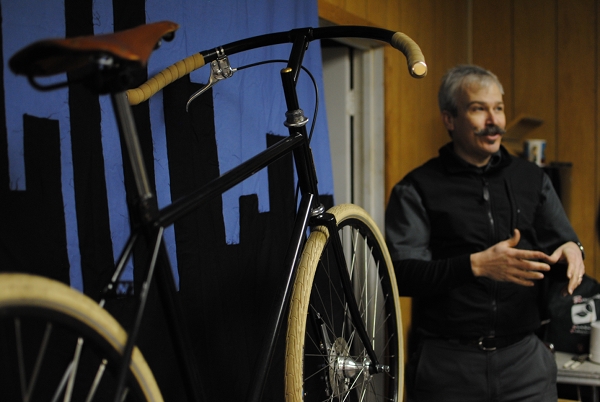
Here Mike explains something to the Co-Habitant, as his Antique Scorcher poses in the foreground. To see some of the other bikes A.N.T. has made recently, have a look at their flickr sets. I wrote a test ride report of a Boston Lady's Roadster here, and I think the latest series of mixtes (especially the gold and the white one) are particularly beautiful. And of course I am very curious to see what Mike will be building for the North American Handbuilt Bicycle Show . I think he knows what my fantasy A.N.T. bike is, but that is another story entirely!